Posts

Showing posts from August, 2019

Vertex Paint Flow map and flow map visualisation

Image
There aren't many tutorials to go with when it comes to Vertex painting Flow maps. I was going to use the concepts that are in UnrealSimon's Flow map Tutorial:  https://www.youtube.com/watch?v=tEr3NE_XLbc   But luckily I found one tutorial by TharleVFX which uses more or less the same process as the flow map texture technique in Unreal Simon's tutorial but uses vertex painting the way I want it:  https://www.youtube.com/watch?v=hDH25HnFneQ . I also wanted a way to visualise the Flow map and distortion of the water system. It can be difficult to see in different lighting conditions especially with the unlit water system I have made. I remembered an old twitter post by H.Kudo: Flowmap Fields Visualizer UE4でフローマップの流れを可視化してみる フローマップはFusion 9で作成 ※音がでます Visualize Flowmap Fields in UE4 Generated Flowmaps in Fusion 9 #UE4 #Fusion9 #RealTime #DataVisualization #indiedev pic.twitter.com/5pDqwBHjN3 — h.Kudo (@_KudoHiroyuki) July 1, 2018 I really like how he

Fluid Simulation Broken 😞

Bad news, since the water system has been changed significantly the Fluid Simulation feature has broken. The material/blueprint connections have somewhat been affected. It will require more time to fix and with the amount of time I have left for the project, I'm afraid I will have to leave this feature out of the waters system. Who knows, if I get a bit of time I might be able to add it later on but for now it will be removed from the water system.

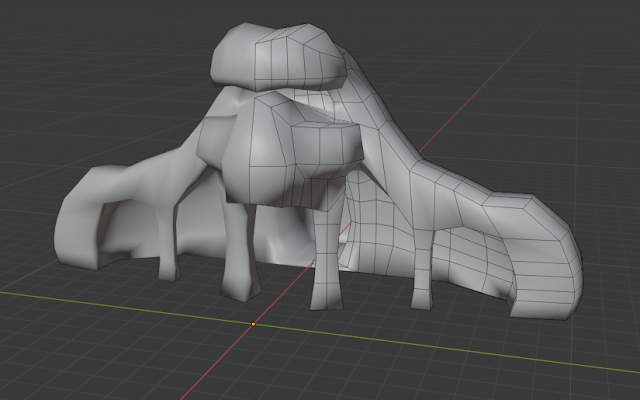
Dungeon Entrance Blockout

Image
I've made a block out model of the Dungeon entrance in Blender. I'm a little confused whether to cut this into modular pieces or if I should make it as one big piece. If I model as one piece there will be issues with texel density but modular pieces will produce weird results when trying to put things together. Dungeon Entrance Blockout Whichever way I choose, I still have to sculpt, bake and texture the asset.

Rocks

Image
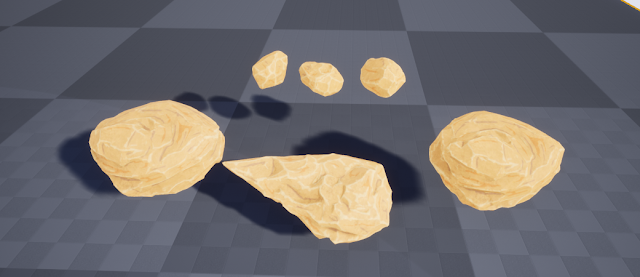
I have finished making 6 Rocks: It might not look much but there is a lot going on in the material. I still wasn't satisfied with the rock's plain base colour information so I overlayed a Noise in substance painter. Moss When I looked at the actual concept art, I forgot to add in some moss variations. So I added Moss variations in substance painter. Since Metallic Map wasn't being utilized I used the moss as a mask and controlled that through the material. I went a bit further and added the option to paint over or remove the Moss pattern with vertex painting. I could add moss based on the vertex Normals where all faces pointing up will be covered with moss but I wanted to use vertex painting to add an extra level of control and produce more or less the same result. Mossy Rock in the metallic map. It can also be Vertex Painted on top. Moss has Fuzzy Shading (Will talk more about it in Normal based Sand/Moss)  Then, I thought about adding more functionality

Git

Image
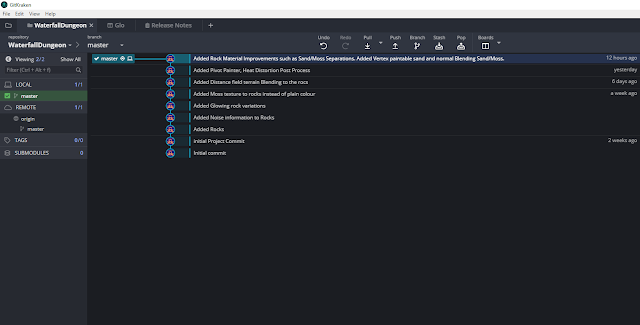
In a humble bundle game development bundle I purchased, I found one tutorial on learning how to use Git Version control from Udemy (Git Smart: Learn Git The Fun Way With Unity ). I have heard about version control like Perforce a few times in the past and it was recommended that I learn how to use it. I thought I'd see what its all about and try it out since it is a short course. I have put the project into Git version control so I do not have to create manual backups for each iteration like I have been doing in the past. It also saves space on the hard drive. It can also 'respawn' your project if you accidentally delete it as if nothing happened to it. It feels easy like saving a game except you are doing the same with a project. However, the main reason I am using it is that I can revert back to a change I made earlier. This gives me the freedo to experiment and not have to worry about messing up the project. This makes version control very useful and important for a

Blender 2.8 afterthoughts

Image
So I've been learning about Blender in the past week using tutorials from Blender themselves, Dallas Doan Maya to Blender tutorials ( https://www.youtube.com/playlist?list=PL5gK0C5TrIwdLSZHPnr9Up6LjhbIiFTJv ) and skimming through  one of  the Udemy tutorials (Blender 2.8 for beginners - Sword creation): https://www.udemy.com/blender-28-for-beginners-sword-creation/ There are a few things that are annoying about Blender and that is the UV Editor and 3D Cursor. The 3D Cursor comes in the way when modelling and the UV editor lacks in certain features like visualizing flipped faces. Although there is a workaround with an addon called Magic UV but it's not a great solution since I have to manually keep clicking on a button to update the colours of the flipped UVs,  Maya wins in this area.  As for the 3D Cursor, I was able to make an addon in my spare time as previously mentioned in an earlier post. Also, Ubisoft, a Triple A studio, have announced that they have switched to  Blen